应用 Axis 1.4 开发 WebService
Axis 1 的最后一个版本还是 2006-04-22 发布的 1.4 Final 版,当前的版本是 Axis 2, 即于 2021-08-01 发布的 Axis v1.8.0 版本。想想在 2006 年 4 月份,软件开发是一种什么样的景象,JDK 5 于 2004-09-30 发布,同年 12 月 12 日 JDK 6 才出来, Spring 还是 1.x 的版本。那时候仍是 EJB 兴旺的年代,微服务概念的出现还有等好多年。
那为什么还要学习 Axis 1.4 呢?目的就是为了放弃,先前的 Axis 1.4 的项目不稍加理解,怎么能顺利的过度到 Axis 2 呢?要说眼下更好的用来开发 SOAP WebService 的库应该首选 Apache CXF。本来拟定的文章标题的 Springboot2 应用 Axis 1.4 开发 WebService, 但一发挥就用力过猛,只得下回另立新篇来再加上 Springboot2 了,因此本篇就是为 SpringBoot2 与 Axis 1 的结合铺路的。
什么是 SOAP,Simple Object Access Protocol, 简单对象访问协议,一种 XML-RPC 的实现。谁都敢号称简单,与当今的 REST API 一对照,任何人都会觉得 SOAP 是把一个远程调用搞得无比的复杂。SOAP 有 1.1 和 1.2 两个版本,现在提 SOAP 基本就是 SOAP 1.2 的代名词。另外,SOAP 1.2 开始也承认不简单,不再明确为 Simple Object Access Protocol 的缩写,而叫做 Messaging Framework (Second Edition)。
Axis 1.4 兼容 SOAP 1.1 和 1.2 两个版本,即例 Axis 升级到了 2, 但 SOAP 本身并没有多大的进展。下面先直接体验一下 Axis 1.4 的示例项目,然后看如何进行开发与调用。
下载 axis 1.4 的二进制包 axis-bin-1_4.tar.gz, 然后解压,把其中的 webapps/axis 拷贝到 Tomcat 的 webapps 目录下,启动 Tomcat, 访问 http://localhost:8080/axis, 就能看到
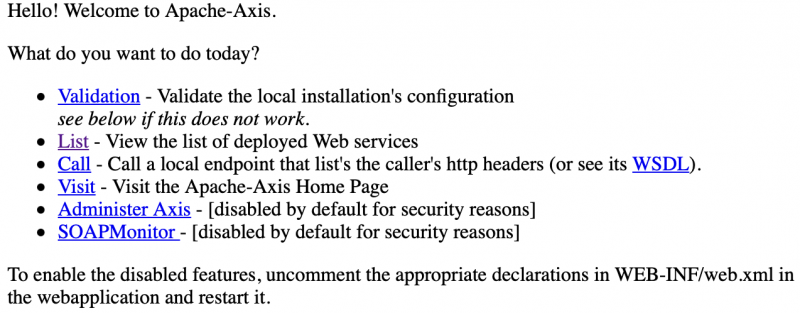 点 Validation 检查必须和可选的依赖包,当前 axis/WEB-INF/lib 下的 jar 包就是我们需要的,分别是 axis-ant.jar, commons-discovery-0.2.jar, jaxrpc.jar, saaj.jar, axis.jar, commons-logging-1.0.4.jar, log4j-1.2.8.jar, wsdl4j-1.5.1.jar。后面我们要用 Maven 管理依赖的话就得把它们加到 pom.xml 中去。
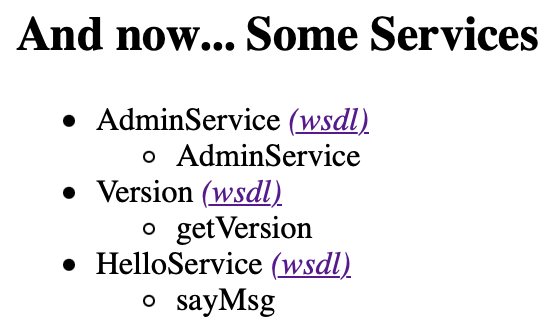
点 List(http://localhost:8080/axis/servlet/AxisServlet) 可看到两个 Service
 访问 http://localhost:8080/axis/services/Version?wsdl 显示该接口的 WSDL(Web Services Description Language) 描述
现在就开始来看下如何调用该 getVersion 接口,有 Dynamic Invocation Interface(DII), Dynamic Proxy, 和 Stubs 方式
执行后得到输出为
注:在上面 HTTP 请求 Body 中
另外还有一种方式叫做 Dynamic Proxy, 需先定义一个客户端的接口,如
还有一种是根据服务描述文档(WSDD) 生成 Java 客户端代码(Stubs), 再进行 SOAP 调用。
jws 文件会在运行时编译到 WEB-INF/jwsClasses 目录中,如:
在 webapps/axis/ 目录中创建一个 SayHello.jws 文件,内容为
由于 SayHello.jws 是一个新文件,Tomcat 需要配置了 tools.jar 在 classpath 下才能编译它,否则访问 http://localhost:8080/axis/SayHello.jws?wsdl 出现错误
调用方式
执行得到输出
com.example.HelloService
假设我们后面操作时的当前目录是 $TOMCAT_HOME/webapps/axis/WEB-INF。那么需要把编译生成的 HelloService.class 文件拷贝到 classes/com/example 下,在 classes 目录下没有 com/example 目录的话请事先创建好。
接下来在 WEB-INF 目录下创建文件 helloservice-deploy.wsdd,内容为
表示我们对于 com.example.HelloService 类, 暴露所有的方法为 Web Service,并且 Scope 为 request。
provider 除 RPC 外,可选的值还有 Document, Wrapped, Message, EJB, RMI
scope 可选值有 request, session 和 application, 即SOAP 请求时产生的服务对象的生存周期
最后一步是生成 HelloService 到 server-config.wsdd 文件中,注意到在 WEB-INF 目录下存在 server-config.wsdd 文件,它列出了我们用 wsdd 方出发布的 Web Service。执行
在 server-config.wsdd 就有了 HelloService 的内容,上面的 AdminClient 命令最终可见的效果就是在 server-config.wsdd 中添加了下面四行
所以使用 WSDD 的方式也可以手动修改 server-config.wsdd 文件,但要重启服务才能生效,而用 AdminClient 则可不用重启服务。不过修改或添加了新的 class 文件,类的热加载工作不正常的情况用 AdminClient 也可能要重启服务。
使用 AdminService 这个 Web Service 也能达成相同的结果,命令如下
现在访问 http://localhost:8080/axis/servlet/AxisServlet,就有了 HelloService
调用该接口, 换一种方式
执行后输出为
然后执行相类似的 AdminClient 命令
所以要创建一个 User 类
完后,把编译好的 HelloService.class 和 User.class 文件拷贝到 $TOMCAT_HOME/webapps/axis/WEB-INF/classes/com/example 目录中。
再编译 helloservice-deploy.wsdd 文件,修改为
执行 AdminClient 命令
 在 http://localhost:8080/axis/services/HelloService?wsdl 能够看到 sayHello 接口的 user(firstname, lastname) 信息
调用 sayHello 接口的代码如下
相应的 HTTP 请求也不能少
最后,由于 WebLogic 8.1 的 webservices.jar 与 saaj.jar 相冲突,要确保在 WebLogic 8.1 中也能正常的话,在 WEB/weblogic.xml 中要加上
关于 WSDL2Java 根据 wsdl 描述文档生成 Java 的 Stub 代码文件这里未涉及。
链接:
[版权声明] 本文采用 署名-非商业性使用-相同方式共享 4.0 国际 (CC BY-NC-SA 4.0) 进行许可。
那为什么还要学习 Axis 1.4 呢?目的就是为了放弃,先前的 Axis 1.4 的项目不稍加理解,怎么能顺利的过度到 Axis 2 呢?要说眼下更好的用来开发 SOAP WebService 的库应该首选 Apache CXF。本来拟定的文章标题的 Springboot2 应用 Axis 1.4 开发 WebService, 但一发挥就用力过猛,只得下回另立新篇来再加上 Springboot2 了,因此本篇就是为 SpringBoot2 与 Axis 1 的结合铺路的。
什么是 SOAP,Simple Object Access Protocol, 简单对象访问协议,一种 XML-RPC 的实现。谁都敢号称简单,与当今的 REST API 一对照,任何人都会觉得 SOAP 是把一个远程调用搞得无比的复杂。SOAP 有 1.1 和 1.2 两个版本,现在提 SOAP 基本就是 SOAP 1.2 的代名词。另外,SOAP 1.2 开始也承认不简单,不再明确为 Simple Object Access Protocol 的缩写,而叫做 Messaging Framework (Second Edition)。
Axis 1.4 兼容 SOAP 1.1 和 1.2 两个版本,即例 Axis 升级到了 2, 但 SOAP 本身并没有多大的进展。下面先直接体验一下 Axis 1.4 的示例项目,然后看如何进行开发与调用。
下载 axis 1.4 的二进制包 axis-bin-1_4.tar.gz, 然后解压,把其中的 webapps/axis 拷贝到 Tomcat 的 webapps 目录下,启动 Tomcat, 访问 http://localhost:8080/axis, 就能看到
 点 Validation 检查必须和可选的依赖包,当前 axis/WEB-INF/lib 下的 jar 包就是我们需要的,分别是 axis-ant.jar, commons-discovery-0.2.jar, jaxrpc.jar, saaj.jar, axis.jar, commons-logging-1.0.4.jar, log4j-1.2.8.jar, wsdl4j-1.5.1.jar。后面我们要用 Maven 管理依赖的话就得把它们加到 pom.xml 中去。
点 List(http://localhost:8080/axis/servlet/AxisServlet) 可看到两个 Service
访问 http://localhost:8080/axis/services/Version?wsdl 显示该接口的 WSDL(Web Services Description Language) 描述现在就开始来看下如何调用该 getVersion 接口,有 Dynamic Invocation Interface(DII), Dynamic Proxy, 和 Stubs 方式
Dynamic Invocation Interface(DII)
我们从 Axis 1 的 github 中找到该 getVersion 接口的实现在 org.apache.axis.Version 类中,其中还有如何调用该接口的代码。整理出的调用代码如下 1import org.apache.axis.client.Call;
2
3public class SoapClient {
4
5 public static void main(String[] args) throws Exception {
6 String servicesURL = "http://localhost:8080/axis/services/Version";
7 Call call = new Call(servicesURL);
8 String result = (String)call.invoke("Version", "getVersion", null);
9 System.out.println(result);
10 }
11
12}执行后得到输出为
Apache Axis version: 1.4如果使用原生的
Built on Apr 22, 2006 (06:55:48 PDT)
javax.xml 的类来实现这一客户端的话,下面的代码与前面的 SoapClient 是等效的 1import javax.xml.namespace.QName;
2import javax.xml.rpc.Call;
3
4public class Client {
5 public static void main(String[] args) throws Exception {
6 String servicesURL = "http://localhost:8080/axis/services/Version";
7 Call call = new org.apache.axis.client.Service ().createCall();
8 call.setTargetEndpointAddress(servicesURL);
9 call.setOperationName(new QName("Version", "getVersion"));
10 String version = (String)call.invoke(new Object[]{});
11 System.out.println(version);
12 }
13}原始 HTTP SOAP 请求
从 Java 实现的客户端看,似乎还应了 SOAP 名称的缩写,但从 HTTP 协议去看就复杂了, 下面是捕获的客户端发出的包,用 cURL 进行 HTTP 请求$ curl -X POST 'http://localhost:8080/axis/services/Version' \SOAPAction; 用示 SOAPAction 的值为空。要用 HTTP 直接调用可不简单啊
--header 'SOAPAction;' \
--header 'Content-Type: text/xml' \
--data-raw '<?xml version="1.0" encoding="UTF-8"?>
<soapenv:Envelope xmlns:soapenv="http://schemas.xmlsoap.org/soap/envelope/"
xmlns:xsd="http://www.w3.org/2001/XMLSchema" xmlns:xsi="http://www.w3.org/2001/XMLSchema-instance">
<soapenv:Body>
<ns1:getVersion soapenv:encodingStyle="http://schemas.xmlsoap.org/soap/encoding/" xmlns:ns1="Version"/>
</soapenv:Body>
</soapenv:Envelope>' <?xml version="1.0" encoding="UTF-8"?><soapenv:Envelope xmlns:soapenv="http://schemas.xmlsoap.org/soap/envelope/" xmlns:xsd="http://www.w3.org/2001/XMLSchema" xmlns:xsi="http://www.w3.org/2001/XMLSchema-instance"><soapenv:Body><ns1:getVersionResponse soapenv:encodingStyle="http://schemas.xmlsoap.org/soap/encoding/" xmlns:ns1="Version"><getVersionReturn xsi:type="xsd:string">Apache Axis version: 1.4
Built on Apr 22, 2006 (06:55:48 PDT)</getVersionReturn></ns1:getVersionResponse></soapenv:Body></soapenv:Envelope>
注:在上面 HTTP 请求 Body 中
xmlns:xsd 和 xmlns:xsi 这两个别名可省略。另外还有一种方式叫做 Dynamic Proxy, 需先定义一个客户端的接口,如
然后基于该接口实现出一个调用 getVersion 的客户端,此处不详述,不管客户端的代码如何变,它们总是在构建相同的 <soapenv> 请求的 Body1public interface GetVersionInterface extends java.rmi.Remote { 2 public String getVersion() throws java.rmi.RemoteException; 3}
还有一种是根据服务描述文档(WSDD) 生成 Java 客户端代码(Stubs), 再进行 SOAP 调用。
Web Service 的开发
大致体验了 Axis 1.4 自带的 axis 服务,及如何调用 SOAP 接口后,现在移步到如何开发和发布一个 Web Service。有两种方式- JWS 即时发布 - Java WebService
- WSDD 定制发布 - Web Service Deployment Descriptor
JWS 即时发布 Web Service
JWS 是一种最简单的方式,把 Java 源文件的扩展名改为 .jws, 放在 Web 根目录下,该 Java 类不能用包名。在 Axis 1 自带的 axis 包中有两个 JWS, EchoHeaders.jws 和 StockQuoteService.jws。jws 文件会在运行时编译到 WEB-INF/jwsClasses 目录中,如:
$ ls jwsClasses用 http://localhost:8080/axis/EchoHeaders.jws?wsdl 和 http://localhost:8080/axis/StockQuoteService.jws?wsdl 就能看到它们各自的描述。EchoHeaders.jws 定义了 list(), whoami(), echo(str) 等方法。为有更好的体验,我们还是写一个自己的 JWS 服务。
EchoHeaders.class EchoHeaders.java SayHello.class SayHello.java
在 webapps/axis/ 目录中创建一个 SayHello.jws 文件,内容为
1public class SayHello{
2    public String sayMsg(String name){
3        return "Hello,"+name;
4    }
5}
由于 SayHello.jws 是一个新文件,Tomcat 需要配置了 tools.jar 在 classpath 下才能编译它,否则访问 http://localhost:8080/axis/SayHello.jws?wsdl 出现错误
Fault - ; nested exception is:选择你喜欢的方式把 tools.jar 加到 Tomcat 的 classpath 中,比如可以这样
java.lang.RuntimeException: No compiler found in your classpath! (you may need to add 'tools.jar')
$ cp /Library/Java/JavaVirtualMachines/jdk1.8.0_281.jdk/Contents/Home/lib/tools.jar $TOMCAT_HOME/lib然后重启 Tomcat,刷新 http://localhost:8080/axis/SayHello.jws?wsdl 就能看到它的 WSDL 文档了。
调用方式
1String servicesURL = "http://localhost:8080/axis/SayHello.jws";
2Call call = new Call(servicesURL);
3String result = (String)call.invoke("", "sayMsg", new Object[]{"Yanbin"});
4System.out.println(result);
执行得到输出
Hello Yanbin与之相应的 HTTP 请求为
curl -X POST 'http://localhost:8080/axis/SayHello.jws' \
--header 'SOAPAction;' \
--header 'Content-Type: text/xml' \
--data-raw '<?xml version="1.0" encoding="UTF-8"?>
<soapenv:Envelope xmlns:soapenv="http://schemas.xmlsoap.org/soap/envelope/"
xmlns:xsd="http://www.w3.org/2001/XMLSchema" xmlns:xsi="http://www.w3.org/2001/XMLSchema-instance">
<soapenv:Body>
<sayMsg soapenv:encodingStyle="http://schemas.xmlsoap.org/soap/encoding/">
<arg0 xsi:type="soapenc:string" xmlns:soapenc="http://schemas.xmlsoap.org/soap/encoding/">Yanbin</arg0>
</sayMsg>
</soapenv:Body>
</soapenv:Envelope>' <?xml version="1.0" encoding="UTF-8"?><soapenv:Envelope xmlns:soapenv="http://schemas.xmlsoap.org/soap/envelope/" xmlns:xsd="http://www.w3.org/2001/XMLSchema" xmlns:xsi="http://www.w3.org/2001/XMLSchema-instance"><soapenv:Body><sayMsgResponse soapenv:encodingStyle="http://schemas.xmlsoap.org/soap/encoding/"><sayMsgReturn xsi:type="xsd:string">Hello,Yanbin</sayMsgReturn></sayMsgResponse></soapenv:Body></soapenv:Envelope>
WSDD 定制发布 Web Service
下面是一种更灵活的定制 wsdd 文件的方式发布 Web Service,这在实际开发中应用更广泛,更便于组织 Java 的实现类。先以一个简单的实例开始,编写一个类com.example.HelloService
1package com.example;
2
3public class HelloService {
4    public String sayMsg(String name) {
5        return "Hello," + name;
6    }
7}
假设我们后面操作时的当前目录是 $TOMCAT_HOME/webapps/axis/WEB-INF。那么需要把编译生成的 HelloService.class 文件拷贝到 classes/com/example 下,在 classes 目录下没有 com/example 目录的话请事先创建好。
$ cp target/classes/com/example/HelloService.class classes/com/example
接下来在 WEB-INF 目录下创建文件 helloservice-deploy.wsdd,内容为
1<?xml version="1.0" encoding="UTF-8"?>
2<deployment xmlns="http://xml.apache.org/axis/wsdd/"
3            xmlns:java="http://xml.apache.org/axis/wsdd/providers/java">
4    <service name="HelloService" provider="java:RPC">
5        <parameter name="className" value="com.example.HelloService" />
6        <parameter name="allowedMethods" value="*" />
7        <parameter name="scope" value="request" />
8    </service>
9</deployment>
表示我们对于 com.example.HelloService 类, 暴露所有的方法为 Web Service,并且 Scope 为 request。
provider 除 RPC 外,可选的值还有 Document, Wrapped, Message, EJB, RMI
scope 可选值有 request, session 和 application, 即SOAP 请求时产生的服务对象的生存周期
最后一步是生成 HelloService 到 server-config.wsdd 文件中,注意到在 WEB-INF 目录下存在 server-config.wsdd 文件,它列出了我们用 wsdd 方出发布的 Web Service。执行
$ java -Djava.ext.dirs=lib org.apache.axis.client.AdminClient helloservice-deploy.wsdd执行上面的 AdminClient 时 Tomcat 还必须是启动着的,否则有错: {http://xml.apache.org/axis/}stackTrace:java.net.ConnectException: Connection refused (Connection refused)
在 server-config.wsdd 就有了 HelloService 的内容,上面的 AdminClient 命令最终可见的效果就是在 server-config.wsdd 中添加了下面四行
1 <service name="HelloService" provider="java:RPC">
2  <parameter name="allowedMethods" value="*"/>
3  <parameter name="scope" value="request"/>
4  <parameter name="className" value="com.example.HelloService"/>
5 </service>
所以使用 WSDD 的方式也可以手动修改 server-config.wsdd 文件,但要重启服务才能生效,而用 AdminClient 则可不用重启服务。不过修改或添加了新的 class 文件,类的热加载工作不正常的情况用 AdminClient 也可能要重启服务。
使用 AdminService 这个 Web Service 也能达成相同的结果,命令如下
$ java -Djava.ext.dirs=lib org.apache.axis.client.AdminClient -lhttp://localhost:8080/axis/services/AdminService helloservice-deloy.wsdd看起来有点绕,既然在应用的 WEB-INF 目录,为何还要走 Web Service。其实都是 AdminClient 的参数
-l 默认值就是 http://localhost:8080/axis/services/AdminService。现在访问 http://localhost:8080/axis/servlet/AxisServlet,就有了 HelloService
调用该接口, 换一种方式
1String servicesURL = "http://localhost:8080/axis/services/HelloService";
2Call call = new org.apache.axis.client.Service ().createCall();
3call.setTargetEndpointAddress(servicesURL);
4call.setOperationName(new QName("", "sayMsg"));
5String result = (String)call.invoke(new Object[]{"WSDD"});
6System.out.println(result);
执行后输出为
Hello, WSDD如果要卸载该 HelloService 服务,在 WEB-INF 下创建一个 helloserver-undeploy.wsdd 文件,内容为
1<undeployment xmlns="http://xml.apache.org/axis/wsdd/">
2  <service name="HelloService"/>
3</undeployment>
然后执行相类似的 AdminClient 命令
$ java -Djava.ext.dirs=lib org.apache.axis.client.AdminClient helloservice-undeploy.wsddHelloService 就会消失了。
一个更复杂的 Web Service
前面的 Web Service 要么无参数,要么参数类型是基本类型,下面的例子输入参数为自定义类型 User。我们在 com.example.HelloService 中再加一个方法1public String sayHello(User user) {
2 return String.format("Hello %s %s", user.getFirstname(), user.getLastname());
3}所以要创建一个 User 类
 1package com.example;
 2
 3public class User {
 4    private String firstname;
 5    private String lastname;
 6
 7    public String getFirstname() {
 8        return firstname;
 9    }
10
11    public void setFirstname(String firstname) {
12        this.firstname = firstname;
13    }
14
15    public String getLastname() {
16        return lastname;
17    }
18
19    public void setLastname(String lastname) {
20        this.lastname = lastname;
21    }
22}
完后,把编译好的 HelloService.class 和 User.class 文件拷贝到 $TOMCAT_HOME/webapps/axis/WEB-INF/classes/com/example 目录中。
再编译 helloservice-deploy.wsdd 文件,修改为
 1<?xml version="1.0" encoding="UTF-8"?>
 2<deployment xmlns="http://xml.apache.org/axis/wsdd/"
 3            xmlns:java="http://xml.apache.org/axis/wsdd/providers/java">
 4    <service name="HelloService" provider="java:RPC">
 5        <parameter name="className" value="com.example.HelloService" />
 6        <parameter name="allowedMethods" value="*" />
 7        <parameter name="scope" value="request" />
 8        <typeMapping xmlns:ns1="http://yanbin.blog" qname="ns1:user"
 9          type="java:com.example.User"
10          serializer="org.apache.axis.encoding.ser.BeanSerializerFactory"
11          deserializer="org.apache.axis.encoding.ser.BeanDeserializerFactory"
12          encodingStyle="http://schemas.xmlsoap.org/soap/encoding/"/>
13    </service>
14</deployment>
执行 AdminClient 命令
$ java -Djava.ext.dirs=lib org.apache.axis.client.AdminClient helloservice-deploy.wsdd如果运气好的,刷新 http://localhost:8080/axis/servlet/AxisServlet 就能看到 HelloService 下有两个接口。看不到的请尝试重启 Tomcat,或清理 $TOMCAT_HOME/work 目录下的缓存
在 http://localhost:8080/axis/services/HelloService?wsdl 能够看到 sayHello 接口的 user(firstname, lastname) 信息调用 sayHello 接口的代码如下
 1package com.example;
 2
 3import org.apache.axis.client.Call;
 4import org.apache.axis.encoding.ser.BeanDeserializerFactory;
 5import org.apache.axis.encoding.ser.BeanSerializerFactory;
 6
 7import javax.xml.namespace.QName;
 8
 9public class SoapClient {
10
11    public static void main(String[] args) throws Exception {
12        String servicesURL = "http://localhost:8080/axis/services/HelloService";
13        Call call = new Call(servicesURL);
14
15        QName qname = new QName("https://yanbin.blog", "user");
16        call.registerTypeMapping(User.class, qname,
17            new BeanSerializerFactory(User.class, qname),
18            new BeanDeserializerFactory(User.class, qname));
19
20        User user = new User();
21        user.setFirstname("Scott");
22        user.setLastname("Tiger");
23        String result = (String)call.invoke("", "sayHello", new Object[]{user});
24        System.out.println(result);
25    }
26
27}
相应的 HTTP 请求也不能少
curl -X POST 'http://localhost:8080/axis/services/HelloService' \以上内容基本涵盖了要往 SpringBoot2 + Axis_1.4 方向走的准备,再有就是 web.xml 中关于 AxisServlet(实现类 org.apache.axis.transport.http.AxisServlet) 的配置,对 url-paatern 为
--header 'SOAPAction;' \
--header 'Content-Type: text/xml' \
--header 'Cookie: JSESSIONID=DCEC1F5487CDE319C406256B0BE00EEC' \
--data-raw '<?xml version="1.0" encoding="UTF-8"?>
<soapenv:Envelope xmlns:soapenv="http://schemas.xmlsoap.org/soap/envelope/"
xmlns:xsd="http://www.w3.org/2001/XMLSchema" xmlns:xsi="http://www.w3.org/2001/XMLSchema-instance">
<soapenv:Body>
<sayHello soapenv:encodingStyle="http://schemas.xmlsoap.org/soap/encoding/">
<arg0 href="#id0"/>
</sayHello>
<multiRef id="id0" soapenc:root="0" soapenv:encodingStyle="http://schemas.xmlsoap.org/soap/encoding/"
xsi:type="ns1:user" xmlns:soapenc="http://schemas.xmlsoap.org/soap/encoding/" xmlns:ns1="http://yanbin.blog">
<firstname xsi:type="soapenc:string">Scott</firstname>
<lastname xsi:type="soapenc:string">Tiger</lastname>
</multiRef>
</soapenv:Body>
</soapenv:Envelope>' <?xml version="1.0" encoding="UTF-8"?><soapenv:Envelope xmlns:soapenv="http://schemas.xmlsoap.org/soap/envelope/" xmlns:xsd="http://www.w3.org/2001/XMLSchema" xmlns:xsi="http://www.w3.org/2001/XMLSchema-instance"><soapenv:Body><sayHelloResponse soapenv:encodingStyle="http://schemas.xmlsoap.org/soap/encoding/"><sayHelloReturn xsi:type="soapenc:string" xmlns:soapenc="http://schemas.xmlsoap.org/soap/encoding/">Hello Scott Tiger</sayHelloReturn></sayHelloResponse></soapenv:Body></soapenv:Envelope>
/servlet/AxisServlet, *.jws, /services/* 都会进到 AxisServlet。还有一个跟随 Tomcat 启动的 AdminServlet(实现类 org.apache.axis.transport.http.AdminServlet),可能须用 SpringBoot2 的方式来声明。最后,由于 WebLogic 8.1 的 webservices.jar 与 saaj.jar 相冲突,要确保在 WebLogic 8.1 中也能正常的话,在 WEB/weblogic.xml 中要加上
1<weblogic-web-app>
2  <container-descriptor>
3    <prefer-web-inf-classes>true</prefer-web-inf-classes>
4  </container-descriptor>
5</weblogic-web-app>
关于 WSDL2Java 根据 wsdl 描述文档生成 Java 的 Stub 代码文件这里未涉及。
链接:
- Differences in SOAP versions
- Axis开发webservice的简单实例
- 二、用wsdd(Web Services Deployment Descriptor)方式发布WebService
- Spring boot axis 1.4 webService Server
- Apache Axis 1.x Java User's Guide
[版权声明]
本文采用 署名-非商业性使用-相同方式共享 4.0 国际 (CC BY-NC-SA 4.0) 进行许可。