创建和发布自己的 Python 包到 PyPI 上
像 Java 可发布包到 Maven 仓库,NodeJS 发布包到 NPM 一样,我们也可以创建自己的 Python 包并发布到 PyPI 仓库中去。或者内部使用的包,只须发布到私有的 Nexus 服务器上。
本文中的例子将创建一个 Python 包 bounded-executor, 并发布到 PyPI 上。为什么创建这个包呢?原因是直接用 Python 的 ThreadPoolExecutor 或 ProcessPoolExecutor 来提交任务的话,任务的等待队列是没有边界的,这就会造成因提交任务过快而使得内存爆满。本包最为合适的名称应该是 bounded-pool-executor, 可是名字已被他人使用,但此外的实现有所不同,ThreadPoolExecutor 用 Queue(maxsize) 来控制,而 ProcessPoolExceutor 用 BoundedSemaphore 来控制。
我们以经典的 Python 工程目录结构为例,构建的核心是执行 setup.py 中的 setup 函数,由此来理解 setup 的最主要配置与关键命令做了些什么。这样有助于我们理解其他的 Python 包管理工具的底层行为,从中我们可以对比 poetry 的 build, install, 和 publish 命令。
打包发布的准备
- setuptools: 这个无需安装,在用 Python -m venv 创建一个虚拟环境后就有了
- pip install wheel:如果要生成 wheels 格式的包就须安装
- pip install twine: 方便发布包到 PyPI 上, python setup.py ... upload 不再使用
- PyPI 上注册一个帐号
项目的结构
bounded-executor
├── README.rst
├── bounded_executor
│ ├── __init__.py
│ └── executors.py
└── setup.py
关键就是 setup.py 文件
该项目 bounded-executor 的核心实现代码不是这里的重点。主要的配置是 setup.py 文件,它调用 setuptools.setup 函数
 1from setuptools import setup, find_packages
 2
 3with open('README.rst') as f:
 4    long_description = f.read()
 5
 6setup(
 7    name='bounded_executor',
 8    version='0.0.3',
 9    description='Bounded ThreadPoolExecutor and ProcessPoolExecutor',
10    long_description=long_description,
11    long_description_content_type='text/x-rst',
12    author='Yanbin',
13    author_email='yabqiu@gmail.com',
14    url='https://github.com/yabqiu/bounded-pool-executor',
15    license='BSD License',
16    packages=find_packages(),
17    platforms=['all'],
18    python_requires='>=3.2',
19    classifiers=[
20        'Programming Language :: Python :: 3',
21        'Programming Language :: Python :: 3.6',
22        'Programming Language :: Python :: 3.7',
23        'Programming Language :: Python :: 3.8',
24        'Programming Language :: Python :: 3.9',
25        'Programming Language :: Python :: 3.10',
26        'Programming Language :: Python :: Implementation :: CPython',
27        'Programming Language :: Python :: Implementation :: PyPy'
28    ]
29)
注:distutils.core.setup 和 setuptools.setup 两个 setup 函数目前都可用,推荐使用 setuptools 中的 setup 函数,见 setuptools vs. distutils: why is distutils still a thing?
包依赖的其他第三方包用 install_requires 配置,如
1install_requires=[
2    'urllib3>=1.21.1,<1.27',
3    'certifi',
4    'idna>=2.5'
5]
测试依赖用 test_requirements 配置,格式与 install_requires 一致。
说明:
- 调用 setup 函数只需填上基本的
name和version两个参数也能构建,发布成功,但尽量填上更详细的包相关的信息。 - 发布到 PyPI 上的版本可以被删除,但被删除的版本号不能再重复使用
long_description是显示在项目页面(https://pypi.org/project/bounded-executor/)主体部位中的内容,可以用 Markdown 或 RST,默认的long_description_content_type是text/x-rst, 如果使用 Markdown 格式,long_description_content_type须设置为text/markdown- 也可以用 setup.cfg 搭配 setup.py 来使用,比如在 setup.cfg 中的 [meatadata] 可填上项目相关的信息,在 setup.py 中只需一个无参的
setup()函数调用,则setup()的信息将会从setup.cfg中来。多加一个setup.cfg还是显得有点多余,setup()函数中的参数名描述的足够清楚。参见 Configuring setup() using setup.cfg files.setup.cfg中有一个方便之处就是可用 attr 或 file 来读取其他文件中的信息,如long_description = file: README.rst, CHANGELOG.rst, LICENSE.rst。
配置了 setup() 后,接下来基本就是围绕着 setup.py 中的 setup() 函数调用。
可以用 python setup.py --help 查看它所支持的一些参数,不过似乎 setuptools 一直没有更新 --help 的输出,它所显示的信息远远不够,更完整的 setup() 函数所支持的参数请参考 setuptools setup() Keywords。
以及后面将要用到的其他一系列的命令,用 --help-commands 预览一下
 1$ python setup.py --help-commands
 2Standard commands:
 3  build             build everything needed to install
 4  build_py          "build" pure Python modules (copy to build directory)
 5  build_ext         build C/C++ extensions (compile/link to build directory)
 6  build_clib        build C/C++ libraries used by Python extensions
 7  build_scripts     "build" scripts (copy and fixup #! line)
 8  clean             clean up temporary files from 'build' command
 9  install           install everything from build directory
10  install_lib       install all Python modules (extensions and pure Python)
11  install_headers   install C/C++ header files
12  install_scripts   install scripts (Python or otherwise)
13  install_data      install data files
14  sdist             create a source distribution (tarball, zip file, etc.)
15  register          register the distribution with the Python package index
16  bdist             create a built (binary) distribution
17  bdist_dumb        create a "dumb" built distribution
18  bdist_rpm         create an RPM distribution
19  bdist_wininst     create an executable installer for MS Windows
20  check             perform some checks on the package
21  upload            upload binary package to PyPI
22
23Extra commands:
24  bdist_wheel       create a wheel distribution
25  alias             define a shortcut to invoke one or more commands
26  bdist_egg         create an "egg" distribution
27  develop           install package in 'development mode'
28  dist_info         create a .dist-info directory
29  easy_install      Find/get/install Python packages
30  egg_info          create a distribution's .egg-info directory
31  install_egg_info  Install an .egg-info directory for the package
32  rotate            delete older distributions, keeping N newest files
33  saveopts          save supplied options to setup.cfg or other config file
34  setopt            set an option in setup.cfg or another config file
35  test              run unit tests after in-place build (deprecated)
36  upload_docs       Upload documentation to sites other than PyPi such as devpi
37
38usage: setup.py [global_opts] cmd1 [cmd1_opts] [cmd2 [cmd2_opts] ...]
39   or: setup.py --help [cmd1 cmd2 ...]
40   or: setup.py --help-commands
41   or: setup.py cmd --help
各式打包相关的命令
开发模式下安装包
先用命令 python -m venv ~/test-venv 创建一个虚拟环境,并 source ~/test-venv/bin/activate 应用它
$ python setup.py develop
它会在当前目录下生成一个目录 bounded_executor.egg-info, 其中有四个文件 PKG-INFO, SOURCES.txt, dependency_links.txt 和 top_level.txt。还在虚拟环境中生成了两个文件
~/test-venv/lib/python3.9/site-packages/bounded-executor.egg-link,内容为
/Users/yanbin/Workspaces/github/bounded-executor
.
~/test-venv/lib/python3.9/site-packages/easy-install.pth, 内容为
/Users/yanbin/Workspaces/github/bounded-executor
后一个文件才是关键,因为它是在 site-packages 目录下的 pth 文件,这就意味着使用同一个虚拟环境的其他项目会直接通过访问 /Users/yanbin/Workspaces/github/bounded-executor 源文件的方式来使用其中的代码。
python setup.py build: 把待打包的文件放到 build/ 目录下
python setup.py sdist: 在 dist 目录下生成以源文件形式发布的包 bounded_executor-0.0.3.tar.gz
$ tar -tf dist/bounded_executor-0.0.3.tar.gz
bounded_executor-0.0.3/
bounded_executor-0.0.3/PKG-INFO
bounded_executor-0.0.3/README.rst
bounded_executor-0.0.3/bounded_executor/
bounded_executor-0.0.3/bounded_executor/__init__.py
bounded_executor-0.0.3/bounded_executor/executors.py
bounded_executor-0.0.3/bounded_executor.egg-info/
bounded_executor-0.0.3/bounded_executor.egg-info/PKG-INFO
bounded_executor-0.0.3/bounded_executor.egg-info/SOURCES.txt
bounded_executor-0.0.3/bounded_executor.egg-info/dependency_links.txt
bounded_executor-0.0.3/bounded_executor.egg-info/top_level.txt
bounded_executor-0.0.3/setup.cfg
bounded_executor-0.0.3/setup.py
python setup.py bdist: 在 dist 目录下生成以二进制形式发布的包,如 bounded_executor-0.0.3.macosx-11-x86_64.tar.gz,它是平台相关的,相对于前面会把 bounded_executor/__pycache__ 目录放到包中
python setup.py bdist_egg: 在 dist 目录中生成 bounded_executor-0.0.3-py3.9.egg,现在不推荐用 egg 包。它也是一个 zip 文件
 1$ unzip -l dist/bounded_executor-0.0.3-py3.9.egg
 2Archive:  dist/bounded_executor-0.0.3-py3.9.egg
 3  Length      Date    Time    Name
 4---------  ---------- -----   ----
 5      782  10-27-2021 15:19   EGG-INFO/PKG-INFO
 6      238  10-27-2021 15:19   EGG-INFO/SOURCES.txt
 7        1  10-27-2021 15:19   EGG-INFO/dependency_links.txt
 8       17  10-27-2021 15:19   EGG-INFO/top_level.txt
 9        1  10-27-2021 15:19   EGG-INFO/zip-safe
10      191  10-27-2021 11:54   bounded_executor/__init__.py
11     1010  10-27-2021 11:35   bounded_executor/executors.py
12      334  10-27-2021 15:19   bounded_executor/__pycache__/__init__.cpython-39.pyc
13     1650  10-27-2021 15:19   bounded_executor/__pycache__/executors.cpython-39.pyc
14---------                     -------
15     4224                     9 files
python setup.py bdist_wheel: 在 dist 目录中管理层成 bounded_executor-0.0.3-py3-none-any.whl, 它也是 zip 包
 1$ unzip -l dist/bounded_executor-0.0.3-py3-none-any.whl
 2Archive:  dist/bounded_executor-0.0.3-py3-none-any.whl
 3  Length      Date    Time    Name
 4---------  ---------- -----   ----
 5      191  10-27-2021 16:54   bounded_executor/__init__.py
 6     1010  10-27-2021 16:35   bounded_executor/executors.py
 7      782  10-27-2021 20:20   bounded_executor-0.0.3.dist-info/METADATA
 8       92  10-27-2021 20:20   bounded_executor-0.0.3.dist-info/WHEEL
 9       17  10-27-2021 20:20   bounded_executor-0.0.3.dist-info/top_level.txt
10      503  10-27-2021 20:20   bounded_executor-0.0.3.dist-info/RECORD
11---------                     -------
12     2595                     6 files
egg 包文件有点老,一般我们只会生成 tar.gz 和 whl 文件, 用
$ python setup.py sdist bdist_wheel
同时生成 bounded_executor-0.0.3.tar.gz 和 bounded_executor-0.0.3-py3-none-any.whl 文件,我们后面要发布到 PyPI 的包可以是其中的一个。
其他打包的形式还有 bdist_dump, bdist_rpm, 和 bdist_wininst
在正式进入发布包之前顺带看下 python setup.py install 发生了什么, 首先它在 dist 目录中生成了 bounded_executor-0.0.3-py3.9.egg 包,并安装(拷贝)到了虚拟环境的 sit-packages 中了,本例为
~/test-venv/lib/python3.9/site-packages/bounded_executor-0.0.3-py3.9.egg
并在 `~/test-venv/lib/python3.9/site-packages/easy-install.pth` 文件中加上一行
./bounded_executor-0.0.3-py3.9.egg
表明已加到了该虚拟环境的 sys.path 中去了,所以开发中还是用 python setup.py develop 就行了,改了源代码后能直接生效,不需要再次 python setup.py install。
发布包到 PyPI
终于来到了最后一步,要把前面生成的包上传到 PyPI 上,我们无须执行 python setup.py register 进行事先注册包,直接上传就行。早先上传包是用 python setup.py <sdist|bdist_wheel> upload 的方式,这种方式也不推荐使用(可能已无法使用),因为它采用 HTTP 传输,见 Uploading your Project to PyPI。
直接用 twine 命令发布包,我们在运行 twine 时会每次提示输入用户名和密码,如果可以把 PyPI 帐号信息存在 ~/.pypirc 文件中。配置明文的帐号和密码
1[pypi]
2  username = <username of pipi.org>
3  password = <password>
或在 pypi.org 中为帐号设置一个 token, 然后在 ~/.pypirc 中的 username 就是 __token__, password 就是那个 token
在前面用了 python setup.py sdist 或 python setup.py bdist_wheel 在 dist 目录中生成了相应的包文件后,先运行 twine check 确保包是有效的
$ twine check dist/bounded_executor-0.0.3.2-py3-none-any.whl
然后上传
$ twine upload dist/bounded_executor-0.0.3.2-py3-none-any.whl
上传成功后就能在 https://pypi.org/project/bounded-executor/0.0.3/ 看到该包的信息,并且随时可用 pip install bounded-executor 来安装使用。
对于生成的 wheel 包是完全一样的操作
$ python setup.py sdist
$ twine upload dist/bounded_executor-0.0.3.tar.gz
或者用 twine upload dist/* 上传 dist 目录所有包,这在严格的构建发布过程中是不推荐的。
对于 tar.gz 还是 wheel, 如果是纯 Python 的包,我们推荐使用 wheel 包。
如果要发布到私有的 Nexus 服务器上可以用
$ twine upload --repository-url=https://nexus.example.com/repository/pypi-hosted/ dist/bounded_executor-0.0.3-py3-none-any.whl
然后依照提示输入用户名和密码就能上传了。
同时发布了 tar.gz 和 wheel 包情况
相同版本的包,我们可以用 twine 发布 tar.gz 和 wheel 包,同时发布了两种类型的包进在用 pip install 时可以留意到它安装的是哪种类型的包,对于 tar.gz 源码包 pip install 下载后仍然要通过 setup.py 创建相应的 whl 包再进行安装使用。所以对于纯 Python 的包做成 universal 的 whl 包发布的话,安装效率最高,同时它实质也包含了源代码。对于使用到了其他的语言(如 C/C++, Rust) 写的 Python 包,可以用 tar.gz 发布,但 pip install 安装时需要有相应的环境进行编译,或者发布为 whl 包,这时候就要考虑为多种操作系统平台与 CPU 架构生成多个 whl 包。
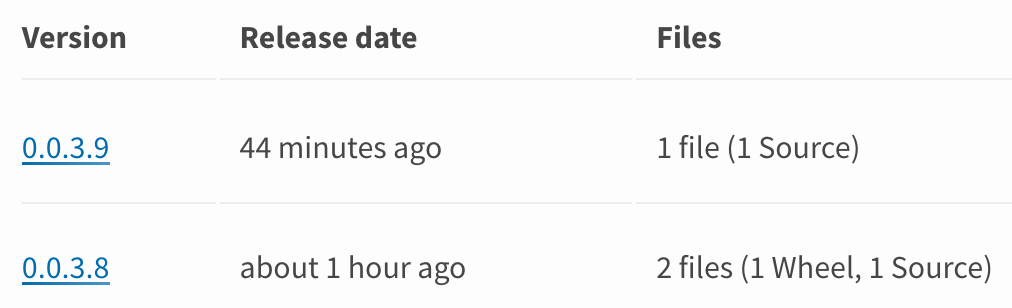
每个版本下有多少个文件,什么类型的文件在 PyPI 中会列出来。
pip 指定仓库安装包
pip install 命令默认从 PyPI 仓库安装包,如果包上传到了别的仓库,或公司的私有仓库,应该如何用 pip install 来安装呢?那就是
$ pip install -i https://nexus.example.com/repository/pypi-hosted bounded_executor
-i, --index-url <url>, 也可以用 --extra-index-url <url>, 特别是 requirements.txt 文件同时含有 PyPI 和私有仓库中包,就应该
$ pip --extra-index-url https://nexus.example.com/repository/pypi-hosted -r requirements.txt
总结
最后总结一下打包发布的过程:
- pip install twine wheel
- 配置好 setup.py 文件
- python setup.py bdist_wheel
- 配置
~/.pypirc, 如果不想每次 upload 输入用户名/密码 - twine upload dist/my-package-*.whl
链接:
- Python 库打包分发(setup.py 编写)简易指南
- 测试开发技术 实战教程: 如何将自己的 Python 包发布到 PyPI 上
- TheadPoolExecutor with a bounded queue in Python
- Python cachetools
[版权声明]
 本文采用 署名-非商业性使用-相同方式共享 4.0 国际 (CC BY-NC-SA 4.0) 进行许可。